
Medela Harmony Manual Breast Pump, Compact Swiss Design with PersonalFit Flex Shields and Medela’s 2-Phase Expression Technology
Check Price
Medela Freestyle Hands-Free Double Electric Breast Pump with Wearable Cups, App Connectivity, Portable Design
Check PriceEver sat down to pump and found your Medela hand pump not working? You’re not alone. Most suction problems come from just a few small parts. The good news? They’re usually easy to fix at home. I learned this the hard way at 2 a.m. I thought my pump was broken. But all it needed was a clean, dry membrane and a snug O-ring.
As a mom, writer, and product reviewer, I’ve tested every trick out there. And I’ve seen what really works. Keep reading, and I’ll walk you through the real fixes, no engineering degree required.
Table of Contents
Quick Fix First: 5 Things to Try Before You Panic

Medela New 2nd Gen Medela Pump in Style Pro Breast Pump, Clinically Proven Hospital-Efficiency, Compact Portable Double Electric Pump with Bottles
Check Price
Medela Perfect Pair Bundle with Medela Harmony Manual Breast Pump & Silicone Breast Milk Collector, Lightweight and Discreet
Check PriceIf your Medela hand pump stops working, don’t stress. It’s usually not broken. Most of the time, a tiny part is wet, loose, or out of place. These simple checks fix 90% of suction issues in just minutes.
Here’s what I do when mine suddenly quits:
- Check the seal on your breast: Make sure the flange (the part on your breast) sits flat against your skin. Even a bra strap can break the seal and kill suction.
- Inspect the white membrane: This tiny piece controls the suction. If it’s wet, curled, or not sealed tight, it won’t work. Take it off, dry it, and press it back in place.
- Re-seat the yellow valve head: The yellow part should sit sideways, not straight up or down. It’s a small detail, but it really matters. I’ve made this mistake more than once.
- Make sure the handle clicks: Push the handle onto the top of the pump until you hear a click. If it’s loose, you’ll get no suction. It should feel tight when you squeeze.
- Look for trapped moisture: Even a tiny drop of water can mess things up. Let all the parts air-dry before you put the pump back together.
Still no suction?
Don’t worry. Next, we’ll dig deeper into the pump and check each part.
What’s Really Wrong? Medela Hand Pump Breakdown
If the quick fixes didn’t help, don’t worry. We’re going deeper. When your Medela hand pump stops working, it usually means one part isn’t doing its job. The tricky part? Even a small seal or crack can kill suction.
I’ve learned to tell what’s wrong by how the pump feels and sounds. Here’s a full breakdown of the key parts, what might go wrong, and how to fix each one fast.
Quick Reference: Parts, Symptoms & Fixes
| Component | What Can Go Wrong | What You Can Do |
| White Membrane | Wet, curled, not sealed | Dry it, press it flat into place |
| Yellow Valve Head | Crooked, cracked | Re-align sideways or replace it |
| Handle & O-Ring | O-ring missing or dry | Check for damage, replace if needed |
| Diaphragm & Stem | Loose fit, air bubbles | Reseat and check for wear or gaps |
| Flange & Connector | Not flush, loose, or cracked | Adjust fit, check for gaps or cracks |
The White Membrane & Yellow Valve Head
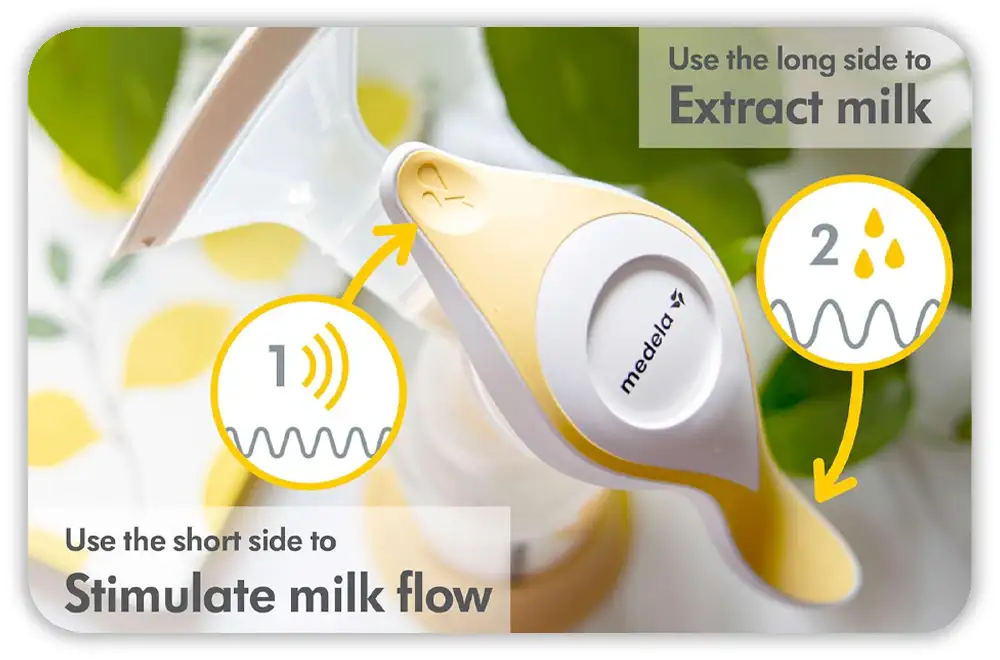
These tiny parts do most of the work. The white membrane controls suction. If it’s wet or bent, no suction. The yellow valve controls milk flow. It needs to sit sideways to work right.
Fix it: Pull off the membrane. Pat it dry. Lay it flat and press it back in place. Make sure the valve sits sideways, not straight up or down.
The Handle & O-Ring
This rubber ring seals the air. If it’s missing or cracked, the pump can’t work. A loose handle is a sign this part might be the issue.
Fix it: Pull off the handle. Look for the rubber ring. If it’s gone or worn out, you can get a new one online, Amazon, Target, or Medela’s site.
The Diaphragm & Stem
This soft piece moves air to create suction. If it’s not seated right or has tiny tears, you’ll lose power fast.
Fix it: Press the diaphragm down snug. Twist the stem to get a tight seal. Look for cracks or wear.
The Flange & Connector Body
This is the large outer part. If it doesn’t sit flush on your breast, suction won’t form. Even a tiny crack or bad angle can stop milk flow.
Fix it: Make sure the edge is smooth and clean. Place it flat against your skin with no gaps.
The Cleaning Trap: How Moisture Can Kill Suction
Medela Harmony Manual Breast Pump, Compact Swiss Design with PersonalFit Flex Shields and Medela’s 2-Phase Expression Technology
Check Price
Medela Freestyle Hands-Free Double Electric Breast Pump with Wearable Cups, App Connectivity, Portable Design
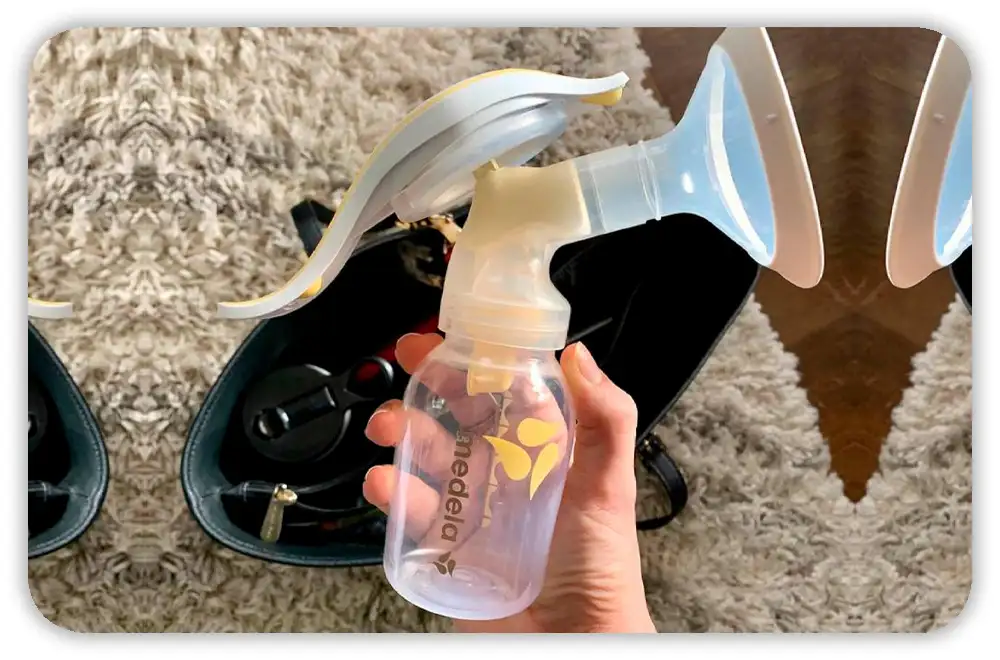
Check PriceHere’s something I didn’t learn until my third pump session in a row failed, water is sneaky. Your Medela pump might look clean and dry. But even one damp spot can stop suction cold.
The first time it happened to me, I had just cleaned every part and laid them out on a towel. Everything seemed fine. But no suction. Turns out, one tiny wet spot under the membrane was the issue. Drying matters, more than I thought.
Why Moisture Stops Suction
If you just cleaned your pump and it’s not working, leftover water is likely to blame. Wet parts don’t seal right. A small gap lets in air, and breaks the vacuum. No vacuum means no milk.
Signs your pump stopped after cleaning:
- Suction feels weak or gone
- You hear a soft “hiss” sound
- Everything looks fine, but still no milk
How to Dry Your Pump the Right Way
Here’s what I do now, every time:
- Take all parts apart before drying
- Place them on a clean rack or paper towel
- Let them air-dry for 1–2 hours
- Avoid towel drying (it can leave lint)
- Always double-check the membrane and valve before reassembling
In a rush?
I use a cool hair dryer on low. A few seconds is enough to dry each part without damage.
Bonus Tip: Keep a Spare Set Handy
After my second late-night fail, I finally got a second set of parts. Life-changing. Now I always have a clean, dry backup ready.
Why it helps to have spares:
- You can swap wet parts fast
- You’ll spot wear early
- You save time by cleaning one set while using the other
How to Reassemble Your Medela Harmony Pump the Right Way
Let’s be honest, putting this pump back together feels harder than it should. I’ve made every mistake out there: wrong angles, loose parts, and yes, even forgetting the membrane (which means zero suction).
If your pump isn’t clicking or feels weak, it might just be put together wrong. Here’s the no-guessing guide I wish I had on day one.
Step-by-Step: How to Assemble the Medela Harmony Pump
This takes under 2 minutes once you’ve done it a few times.
1. Start with the yellow valve head
- Push it into the bottom of the connector.
- Make sure it sits sideways, not straight up.
2. Add the white membrane
- Press it flat over the yellow valve.
- It should lie smooth, with no bubbles or folds.
3. Fit the flange onto the connector
- Line it up and twist it gently into place.
- The seal should feel tight, with no gaps.
4. Snap in the diaphragm and stem
- Press the diaphragm firmly into the top.
- Twist the stem until it feels locked.
5. Attach the handle
- Line it up with the groove on top.
- Push down until you hear a clear “click.”
Common Assembly Mistakes to Avoid
These small slip-ups can stop suction cold, I’ve done them all.
- Forgetting the membrane (no suction at all)
- Crooked yellow valve (milk won’t flow)
- Diaphragm not pressed in fully (leaks or weak suction)
- Handle not clicked in (feels loose or wobbly)
Pro Tips from Moms: Hacks That Actually Work
Medela New 2nd Gen Medela Pump in Style Pro Breast Pump, Clinically Proven Hospital-Efficiency, Compact Portable Double Electric Pump with Bottles
Check Price
Medela Perfect Pair Bundle with Medela Harmony Manual Breast Pump & Silicone Breast Milk Collector, Lightweight and Discreet
Check PriceYou’ve cleaned, dried, and checked every part. But maybe your Medela hand pump still feels off, or you just want it to work faster. These are the tricks real moms (me included!) swear by.
I call them “real-life hacks.” You won’t find them in the manual, but they make pumping easier, quicker, and more comfy.
Swap in a Duckbill Valve (Yes, Really)
This one caught me off guard: Some moms swap the yellow Medela valve for a soft duckbill valve, the kind used in electric pumps.
Why it works: Duckbills often make a tighter seal. That means better suction, especially if your old valve is worn.
Try this:
- Find a duckbill valve that fits the Harmony pump (try Maymom or Nenesupply).
- Pop it in place of the yellow valve.
- Make sure it moves freely when you pump.
Find Your Letdown Rhythm
Manual pumps need rhythm. Mimic a baby’s nursing style to get better flow.
Here’s what works for me:
- Start with fast, short squeezes: This helps trigger letdown. Do it for 30–60 seconds.
- Switch to slow, deep squeezes: Press all the way, hold for 2–3 seconds, then release.
Think of it like a beat: fast-fast-fast, then sloooow-squeeze.
It feels odd at first, but soon the flow picks up, and pumping feels natural.
Get a Better Flange Fit with Silicone Inserts
If pumping hurts or you’re not getting much milk, your flange might not fit well. I didn’t know size mattered, until I tried inserts.
Here’s what helped:
- I used a soft silicone flange insert (also called a cushion).
- It made the fit snugger and more comfy.
- It also boosted suction with a better seal.
Don’t guess, use a printable nipple ruler (Medela has one).
Better fit = better results.
Tiny Fixes That Make a Big Difference
These little tweaks made pumping smoother for me:
- Warm the flange before use (helps trigger letdown)
- Add a drop of breastmilk to the rim for comfort
- Pump while nursing on the other side (double output!)
- Try a hands-free bra, even with a manual pump
When It’s Time to Replace or Call Medela
Sometimes, no matter how much you clean, dry, or reassemble… your Medela hand pump still won’t work. I’ve been there, sitting at the kitchen table, checking every part, and still getting no suction. If that’s you, it might be time to replace a part, or the whole pump.
Signs Your Pump Might Be Worn Out
Manual pumps don’t last forever. After months of use, parts wear down. Here’s what to watch for:
- Suction feels weak, even after full reassembly
- Handle feels loose or won’t click in
- Diaphragm looks thin or stretched
- O-ring is cracked, missing, or flat
- No milk flow, even with a good seal
If you’ve been using the pump daily for 6+ months, it might just be worn out.
How to Contact Medela (They’re Actually Helpful)
Medela’s support team is great, especially if you’re still under warranty (manual pumps usually have 90 days in the U.S.).
Here’s how to get help:
- Call: 1-800-435-8316 (Mon–Fri)
- Email: medelamoms@medela.com
- Tip: Keep your receipt if you’re still in the warranty window
They might send a free replacement part or walk you through a fix.
Buying Medela Spare Parts: What to Get & Where to Find Them
If you’re out of warranty, no stress. You can still fix most issues with the right spare parts.
| Part | Why It Matters | When to Replace | Where to Find It |
| O-ring | Seals the handle for suction | If it’s dry, cracked, or missing | Amazon, Target, Medela.com |
| White membrane | Controls suction | Bent, stretched, not sealing | Most spare kits |
| Yellow valve head | Directs milk flow | Cracked or won’t sit right | Sold in multi-packs |
| Diaphragm & stem | Makes suction work | Loose or worn | Comes in top assembly sets |
| Flange | Touches your breast | Cracked or doesn’t fit right | Can size up or down if needed |
Bottom Line
If your Medela hand pump still isn’t working after all this, don’t blame yourself. These parts wear out over time. Replace what’s worn, or call Medela for help. Either way, you’re not stuck.
Conclusion: You’re Not Alone, And You’ve Got This
Medela Harmony Manual Breast Pump, Compact Swiss Design with PersonalFit Flex Shields and Medela’s 2-Phase Expression Technology
Check Price
Medela Freestyle Hands-Free Double Electric Breast Pump with Wearable Cups, App Connectivity, Portable Design
Check PriceIf your Medela hand pump has left you tired, frustrated, or unsure, you’re not alone. I’ve been there, too. Sitting in silence, checking every part, and wondering what went wrong.
Here’s the truth: even the best pump needs care (and sometimes a new O-ring).
What I’ve learned is simple, most problems have easy fixes. Once you know what to check, things get faster, easier, and less stressful. You’re doing something amazing. And just because one session goes off-track doesn’t mean you’ve failed.
Have a tip or a mom-hack that helped you?
I’d love to hear it. Share your story in the comments or message me, so other moms can learn from you, too.
FAQs: Medela Hand Pump Not Working
Why is my Medela hand pump not working after cleaning?
Moisture left on small parts, like the membrane or valve, can break suction. Always let parts air-dry fully before reassembling.
How do I fix suction issues with my Medela hand pump?
Check the membrane, valve, O-ring, and handle. Most suction loss comes from loose or wet parts that are easy to adjust or replace.
Can I replace parts if my Medela hand pump stops working?
Yes. You can buy spare membranes, valves, O-rings, and diaphragms from Medela or compatible brands like Maymom and Nenesupply.
What does it mean if my Medela manual pump clicks but has no suction?
It often means the O-ring or diaphragm isn’t sealed tight. Recheck all connections and make sure nothing’s missing or misaligned.
How long does a Medela hand pump last before parts wear out?
With regular use, small parts may wear out in 3–6 months. Weak suction or a loose handle often means it’s time to replace them.